Learn Techniques For Photographers from Best Photographers in Thane and Mumbai. Contact Mr. Amol Patil Call +919967544378 for more details.
When somebody says that he/she is an ambient light photographer then I reckon they are either afraid of using external source of light like most other so-called photographers or doesn’t understand the fact that what distinguishes a amateur from a professional photographer is the creative use of artificial light. More so in a studio portrait session.
Here let’s have a look at the 6-studio portrait lighting technique every photographer should know.
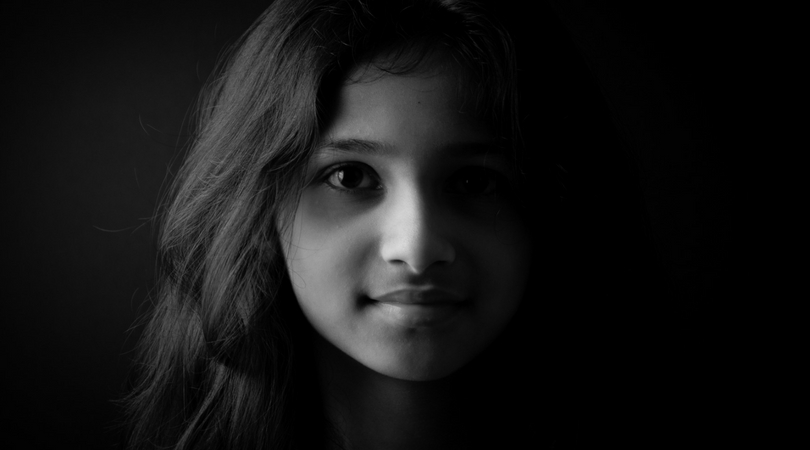
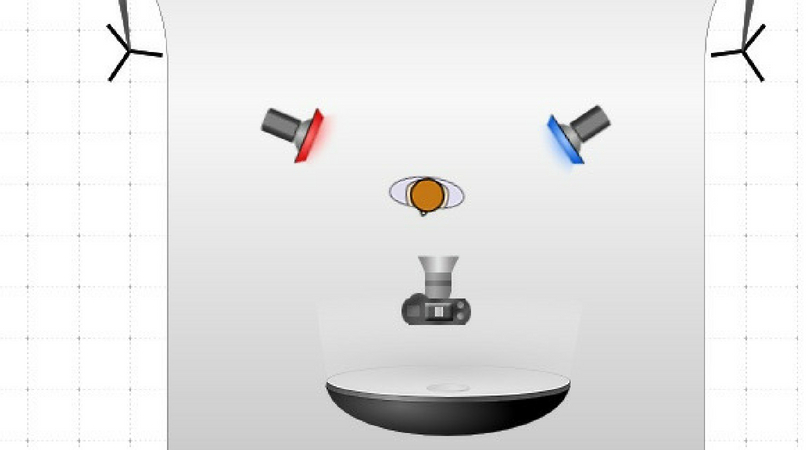
1. Split Lighting Techniques For Photographers
As the name suggest it splits the face of the subject into two equal halves one which is heavily shadowed and other highlighted. It gives a dramatic effect to the portraiture. To achieve the effect the main light is exactly at 90 degrees to the subject & the model should be looking directly at the camera
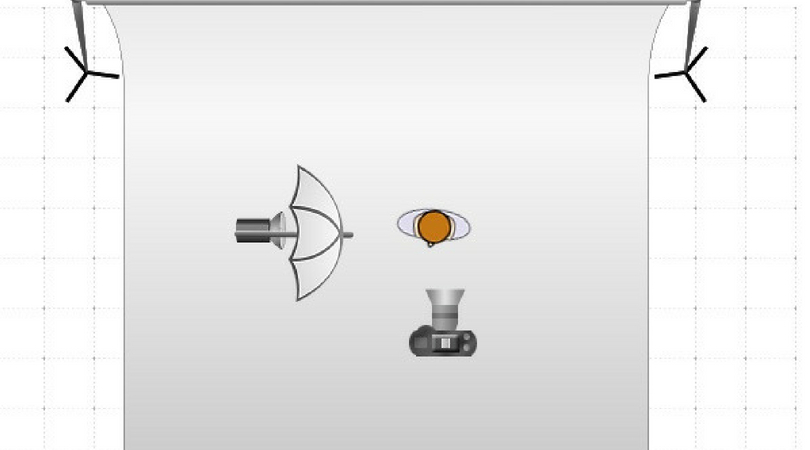
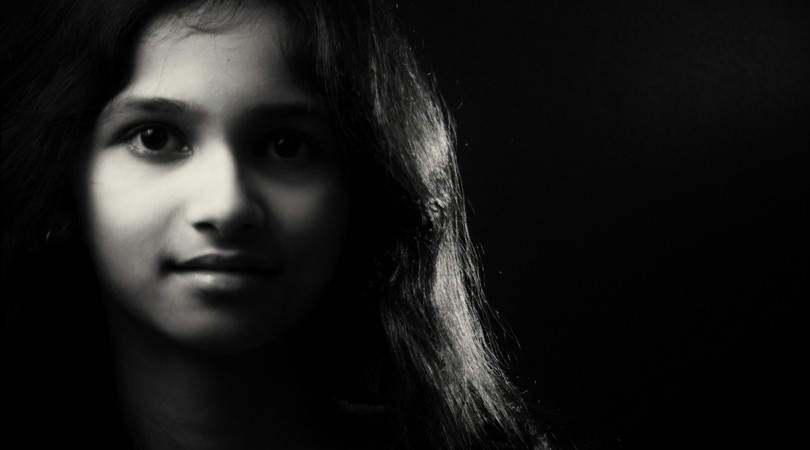
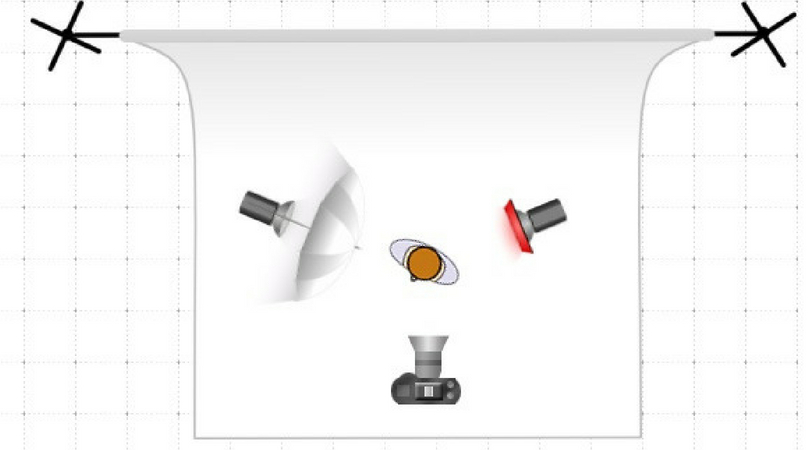
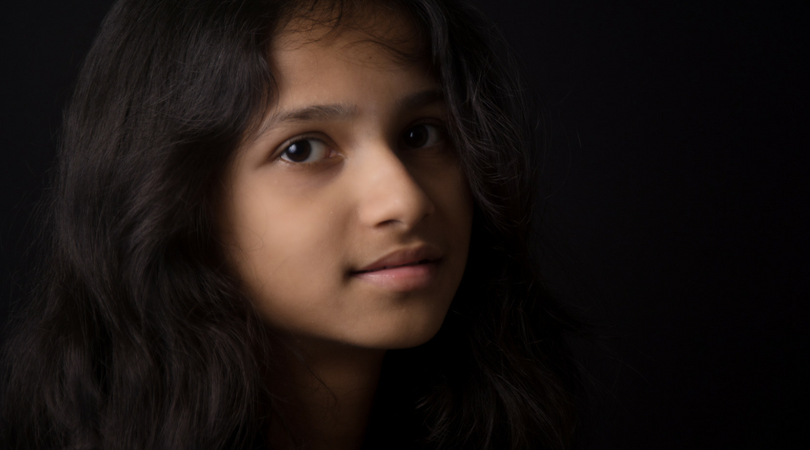
2. Rembrandt lighting Technique For Photographer
This particular lighting technique is named after the famous painter Rembrandt. The peculiarity of Rembrandt lighting is the illuminated triangle on the cheek in the shadowed area, otherwise its similar to split lighting. Care should be taken to see that the triangle will illuminate just below the eye and not below the nose. The main light is positioned high at 45 degrees to the subject.
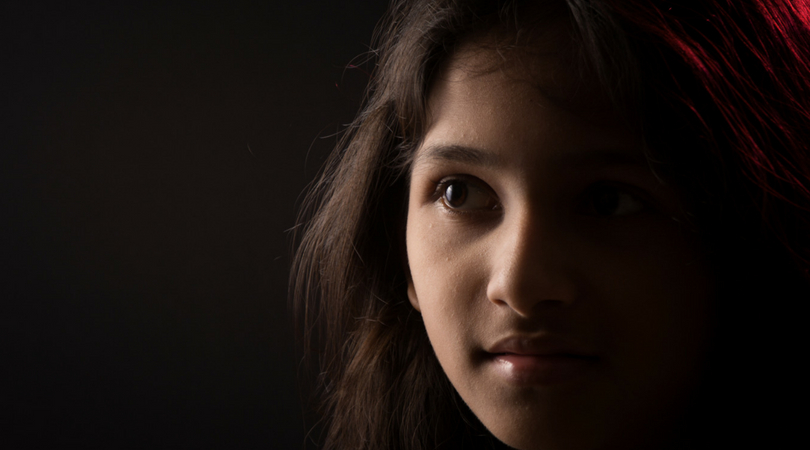
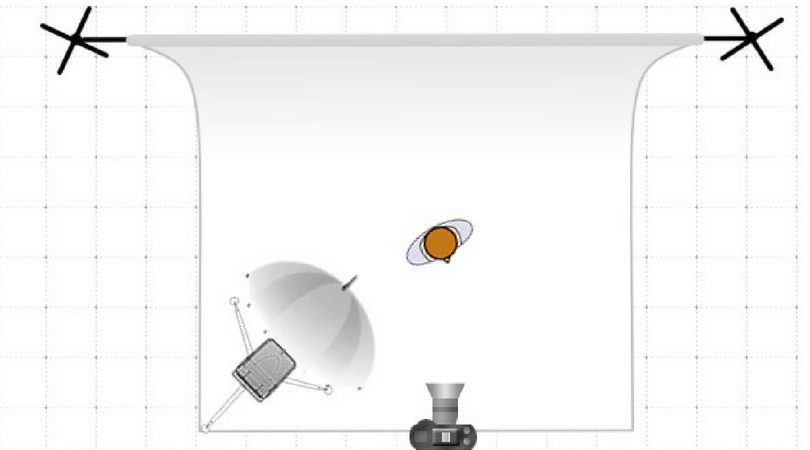
3. Short lighting Photography Techniques
The side of the face away from the camera gets maximum light. Since less area of the face is light it has a sculpturing effect and tends to make the face visually thinner. It is ideal for use on people with large chubby faces
4. Broad lighting Techniques For Photographers
It is exact opposite of the short lighting i.e. The side of the face towards the camera gets the maximum light. Since maximum area is lit it tends to make the face look bigger and is mostly avoided
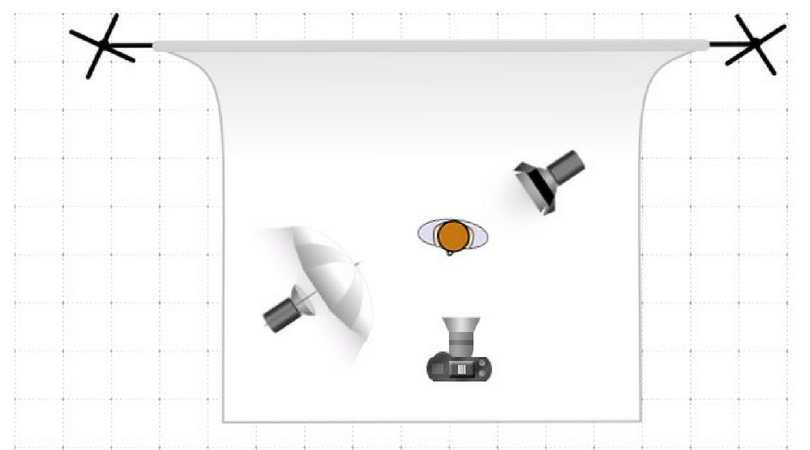
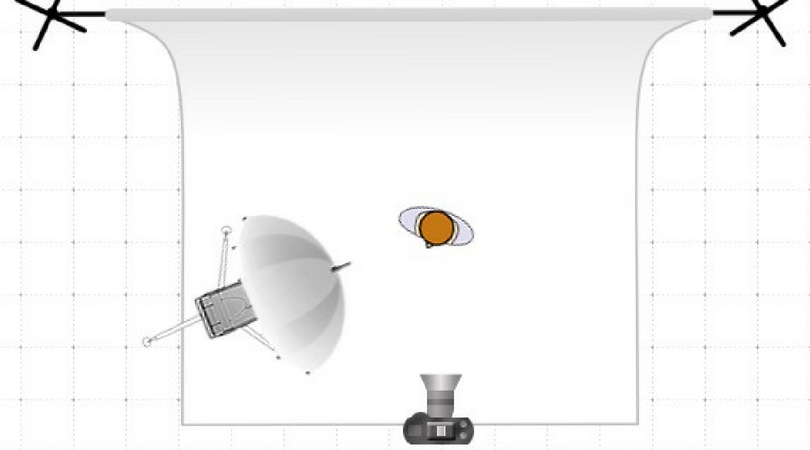
5. Butterfly lighting Photography Technique
This type of lighting is achieved by positioning the main light directly in front & high above the subject’s face. This creates a shadow directly under, and in line with the nose which looks like a butterfly and hence the name. It is advisable to use a reflector under the main light source to fill the underside of the face. It is a more glamourous style of lighting. It is also called Paramount lighting after the famous Hollywood studio because they extensively used this lighting technique to illuminate their heroines
6. Loop Lighting
This type of lighting setup creates small shadow of the subject’s nose on their cheek. The loop is open in a sense that it doesn’t merge with the shadow created by the cheeks otherwise it tends to be more of Rembrandt lighting
Putting it all together :
Practice and experimentation would help get you the desired result. Make use of the modelling light on the studio strode to see the play of highlights and shadow, get the effect right under the continuous modelling light and then click. One can imagine how difficult and frustrating it would be to see the effect until after the photo is taken. A rotating modelling stool helps as you can change the angles of your model with reference to the camera and light to achieve the desired effect
Techniques For Photographers
Follow us on our Facebook